Device
The Envizor P3-S features 3 serial ports and a Modbus expansion port. But, there's so much more. It's intuitive, logical, and rugged design keeps you focused on your core responsibilities.


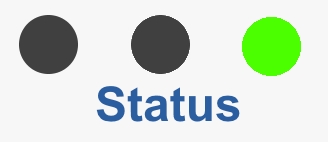
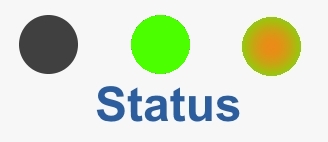
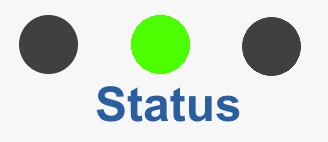
Simple, intuitive status indicators
Three LED status displays—each supplied with green and orange colors—are engineered with logic to tell you which sensors are connected and working.

Secure power connectors
The threaded DC power connectors ensure that your device stays connected no matter what happens during deployment.

Strong Signal
Verizon's CAT M1 4g LTE network has proven to be the largest, strongest, and best maintained networks for IoT (Internet of Things).
Frequently Asked Questions (FAQ)
Have some questions?
Whether you're new to this stuff or a seasoned pro, we've got answers!
Before You Deploy
Yes. Envizor is used everyday on dozens of Community Air Monitoring Plan projects. Nearly all Envizor users notice a remarkable improvement in time spent deploying and maintaining their CAMP stations.
There are a wide variety of compatible sensors. We’d be happy to explore your application if you do not see it listed below:
- VOCs down to ppb resolution & humidity suppression
- Up to 5 Toxic Gas sensors
- Fugitive Dust
- Weather
- Sound level with octave analysis
- Water Pressure and Temperature
There are three serial ports for up to three serial communicating sensors simultaneously. Additionally, there is a Modbus expansion port for additional Modbus devices.
Yes. The most common request is a 1 minute interval and a rolling 15 minute average for Dust and VOCs. So, we’ve enabled those by default! Other averaging intervals, ie. 5 minute, 10 minute, can be accomplished with just a few extra steps on the Sensor Configuration screen.
The Envizor modem will always make an initial call to the server once it is supplied power. Then, it will begin its Active Schedule. The Active Schedule can be customized. Typically, we set them to call in once every 5 minutes. This means that calls will be placed on the tens and fives, ie. hh:00, hh:05, hh:10, hh:15, etc., while it is powered.
Yes. Customized alerts can be sent via email or text to any user.
The alert condition is set up on the server. Therefore, the alert can only be sent to users upon the next scheduled call after the alert limit has been exceeded. If the Active Schedule is set to 5 minutes, then the biggest potential delay would be up to 4 minutes.
The typical Envizor station requires up to 1.2 amps per hour from a 12VDC battery. The size of the battery will determine how long the station will operate. Smaller SLA batteries can be placed in the enclosure for easy daily setups and overnight charging. Large AGM batteries can be deployed and placed near the enclosure in weather-resistant boxes for longer run times. Solar panels can be added for even longer runs. Even better – weather-resistant AC power adapters are available if there is an AC power source nearby.
Go to the Accounts & Users page. Select Request New Account. Fill out the form and submit. We’ll get you set up right away.
Envizor can display each station all on a single Dashboard or we can split them into separate accounts. It’s fully customizable and up to you!
After You Deploy
The Status lights on the top of the Envizor device will tell you if your sensors are successfully connected.


This is likely because you are using an outdated browser. We suggest using Google Chrome or another similar, up-to-date browser for the best experience.
• Log in at Envizor.io. Click on the Users tile in the center of the Dashboard. Click the Add button at the top-right of the page. Fill out the form and Save.
• Or go to the Accounts & Users page. Select Request New User. Fill out the form and submit. We’ll set up your new user and send their credentials right away.
Limit alerts are customizable for each channel that is reporting on a Cellara device. To set up a limit alert:
• Log in at Envizor.io
• Click on the device tile at the bottom of the Dashboard
• Click on the Sensor Config item from the menu on the left side of the page
• Select the sensor from the top table. The bottom table will display the channels for the selected sensor.
• Click the Edit button to the left of the channel. The Edit Channel pop up screen will display
• Check the box for Limits Enabled
• Input your values in the appropriate field. Air quality values will always be “Alarm if Reading is above”
• Save!
The time stamp on the alerts are UTC (Coordinated Universal Time). Using UTC allows our server to write the message without verifying each individual recipient’s timezone. This simplifies delivery of the alerts and greatly reduces bounced messages. Keep in mind that nearly all of the popular messaging apps will display a timestamp of each message on the recipient’s device.
For reference the current UTC is:
Yes. We find that it is much easier to manage your stations when they have a meaningful name and are organized on the Dashboard. The Device tiles on the Dashboard will be organized numerically first (0 to 9), then alphabetically (A to Z). To change the name of your stations:
• Log in at Envizor.io
• Click on the device tile at the bottom of the Dashboard. This opens the Details page.
• Scroll down until you see the Device Information tile. Click on the Edit button located in the top-right corner of the tile. The Edit Channel pop up screen will display.
• Input your name for the device. Don’t forget: you can also add more identifying information into the Purpose and Reference fields.
• Save!
The Device tiles on the Dashboard are organized by their Name numerically first (0 to 9), then alphabetically (A to Z). Refer to the previous question for instructions on renaming your devices.
Click on the Device tile at the bottom of the Dashboard. This will open the Details page. Scroll down until you see the Sensor Readings tile. You can adjust the “View Prior” time periods and “from date:” in the fields on the top-right corner of the tile. Press Refresh to view the data.
By default, data will be displayed in Graphs organized by the unit of measure. At the top of the tile, you can toggle between the Graph Data and Table Data tabs according to your preference.
Once you have selected a Device from the Dashboard, you will be viewing the Details page. This page is great for viewing a snapshot of your data. For downloading, we recommend using the Sensor Reports page from the menu on the left. This gives you control over which sensors are displayed.
Data can be downloaded in two manners:
• PDF Reports: Once you have selected the sensors to be displayed and the time period for the data, each graph has a quick print icon in the top right corner. Click this icon to download a .pdf report of the data displayed.
• CSV Table: Click on the table tab at the top of the tile. There is a “CSV” button in the heading. Click this button to download a .csv table.
Platform
The Envizor.io portal features a simple, clean user interface that displays the information you need with fewer clicks. Less screen time equals more productivity!

Quickly print fully customized reports with charts with one click.

Receive limit alerts to your email or mobile phone directly from each station.
Take it for test drive.
Feel free to log in and take a look around. If you like what you see, let us know and we'll set up a full demo for you.
Username: demo@envizor.com
Password: Justademo
Versatile, rugged enclosure
This enclosure is ready to be deployed anywhere, with any thing!
- Fiberglass reinforced polyester, UL 50, NEMA Type 1, 3, 4X, 6P, 12, -40°F to +250°F
- VOC / Toxic Gas Inlet
- Ventilation for proper air exchange
- Sturdy handle for easy transport and quick deployment
- External Power Port for solar-charged power - up to four devices simultaneously!
LET'S START TALKING ABOUT YOUR EQUIPMENT
We will discuss your challenges and offer you our best prices!